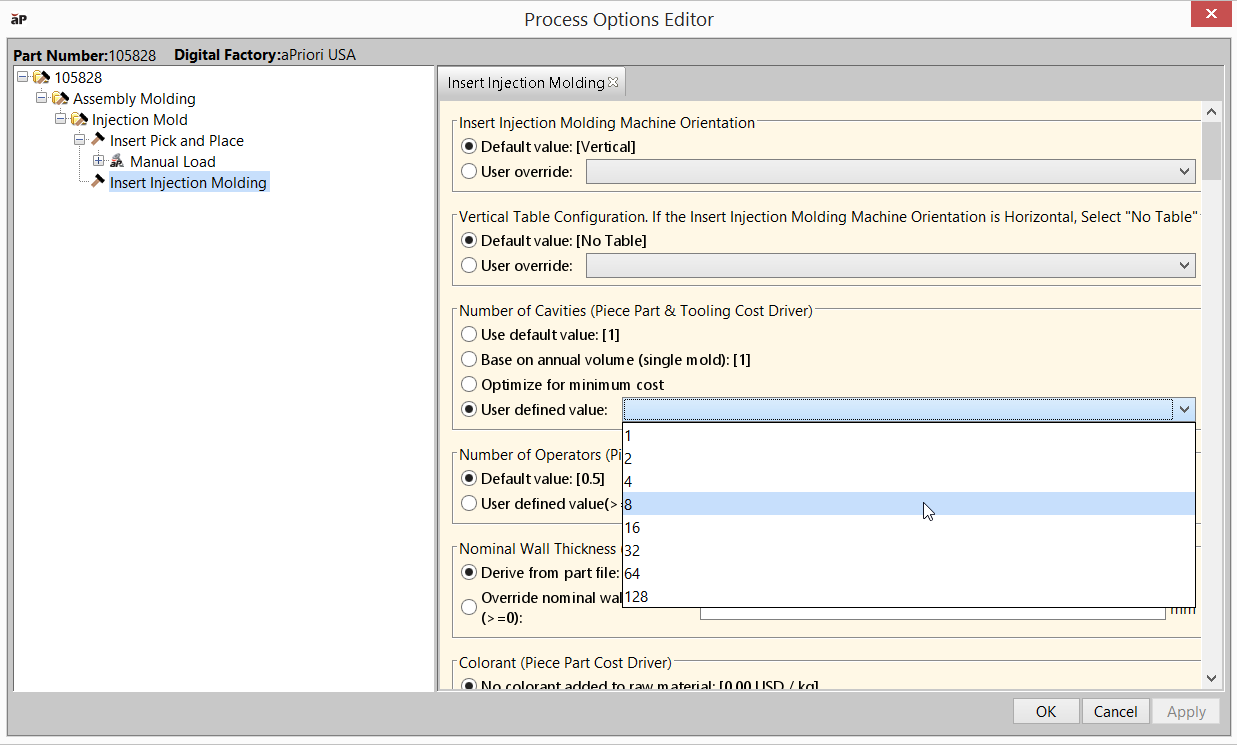
Use Process Setup Options (PSOs) to configure the costing of an individual part. For example, if you cost a part using the Plastic Molding process group, you can use a setup option to define the number of mold cavities used for that part.
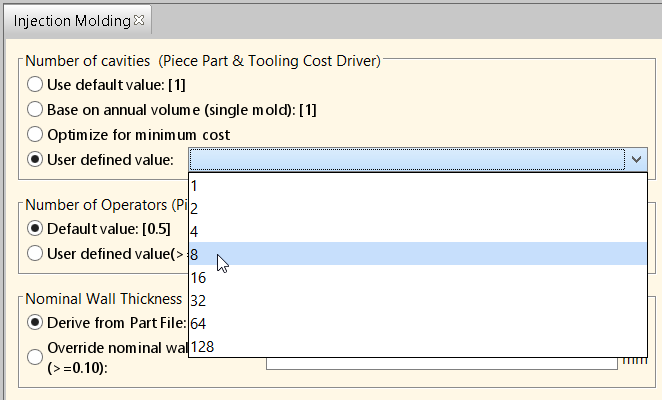
Each PSO applies either at the process level or at the individual GCD level. A process-level setup option such as Number of Cavities has a single setting for a given part, while a GCD-level setup option can be set differently for different operations on different GCDs. For example, you can use a setup option to specify the load time for a particular insert in an Assembly Molding part.
All PSOs have reasonable default settings (except for some process setup options in user-guided process groups, see the chapter User Guided Process Groups in the Cost Model Guide).
You only need to use a setup option when you want to override these defaults.
View and Edit PSOs
You can view and edit PSO information both before and after running analysis on a part.
Before Analysis
To view the available Process Setup Options for a Process Group before initial costing:
-
In the Process Routing section of the Cost Guide, click the ... icon next to aPriori-computed routing.
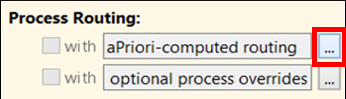
The Routing Selection dialog appears.
-
In the Process Routing dialog, click a node's + or - to expand it or contract it. Right click a node to display the setup options associated with it.
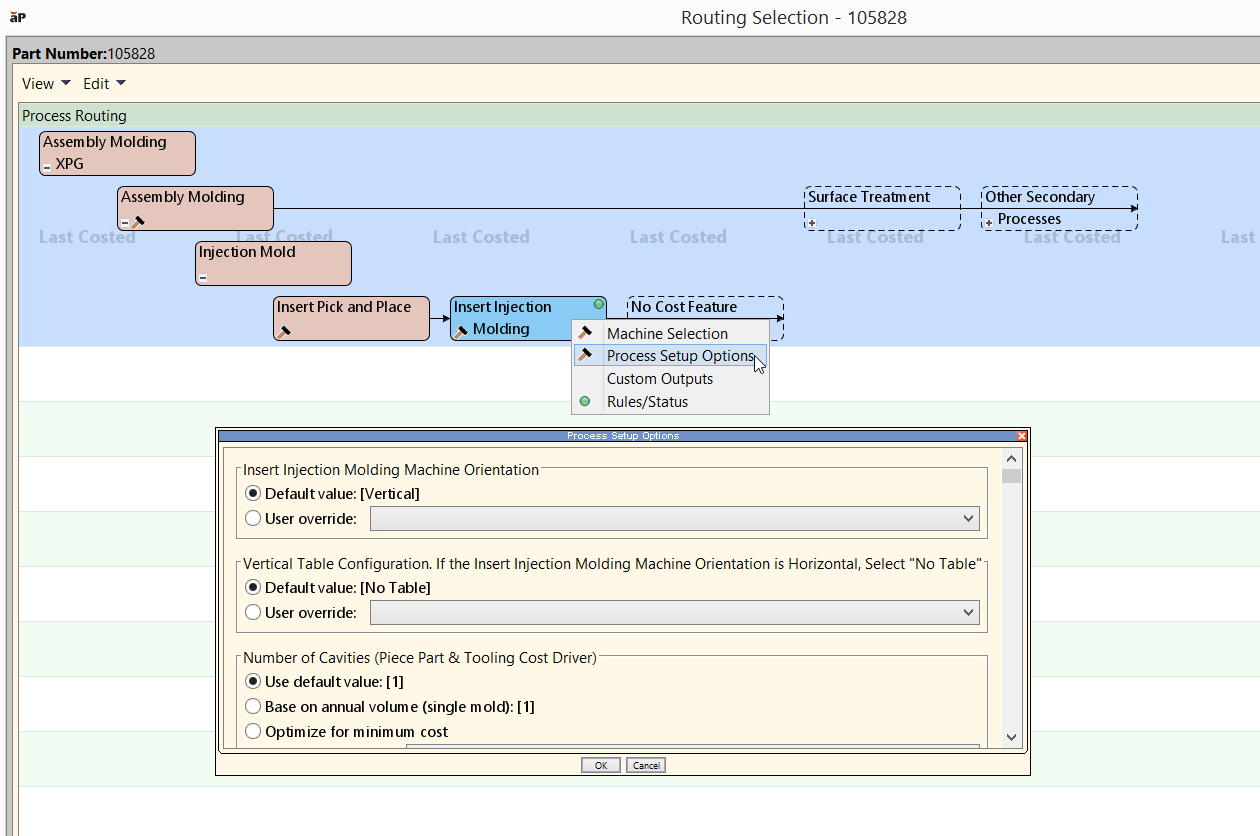
See Process and Machine Options Tab.
After Analysis
To view the available Process Setup Options for a Process Group after Initial Costing:
-
Select Edit > Process Setup Options in the Manufacturing Process pane.
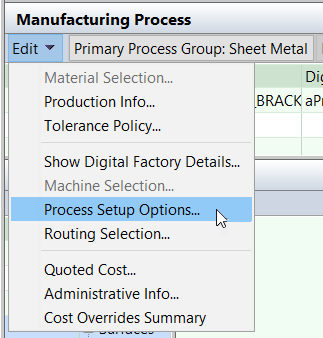
The Process Options Editor appears, showing the current routing as a tree on the left pane:
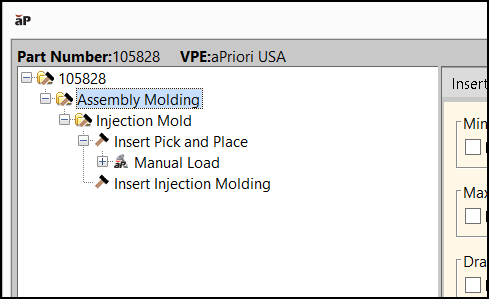
(If a routing process is not shown, that process does not have setup options)
-
Click the relevant process or GCD:
See also Set GCD-level Options.
-
Click OK to apply changes, recalculate the cost, and close the Process Options Editor or click Apply to apply changes and recalculate the cost without leaving the Process Options Editor.
Note: When you override a default with a PSO, aP Pro validates your setting based on the information last extracted from the current part's CAD model. If you change the CAD model, the existing PSO setting is not re-validated. A value that is no longer valid can cause the part or some GCDs to fail to cost.
Note: When you enter an override for a process setup option, aPriori validates your input based on the information currently known about the component geometry. However, if you enter a valid PSO override, and then change the CAD model geometry later, the existing PSO override is not re-validated and a value that is no longer valid can cause subsequent costing operations to fail.
For details about the process setup options available for each process group, see the Cost Model Guide.
Set GCD-level Options
To set a GCD-level option, click the relevant GCD under the relevant operation occurrence in the navigation pane of the Process Options Editor.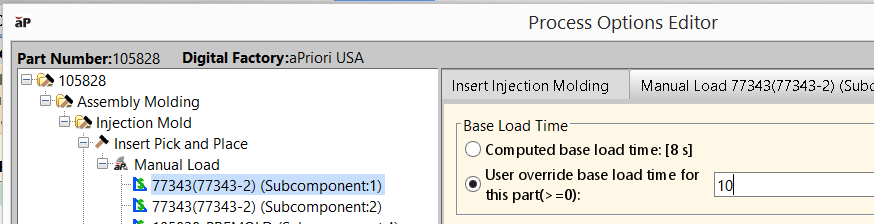
You can set a PSO on multiple GCDs at once: In the navigation pane of the Process Options Editor, click the first GCD and then either shift-click to select the end of a range of GCDs or CTRL-click to select additional GCDs.